Multi-cluster Install

Note: Downstream clusters in Rancher are automatically registered in Fleet. Users can access Fleet under Continuous Delivery on Rancher.
Warning: The multi-cluster install described below is only covered in standalone Fleet, which is untested by Rancher QA.
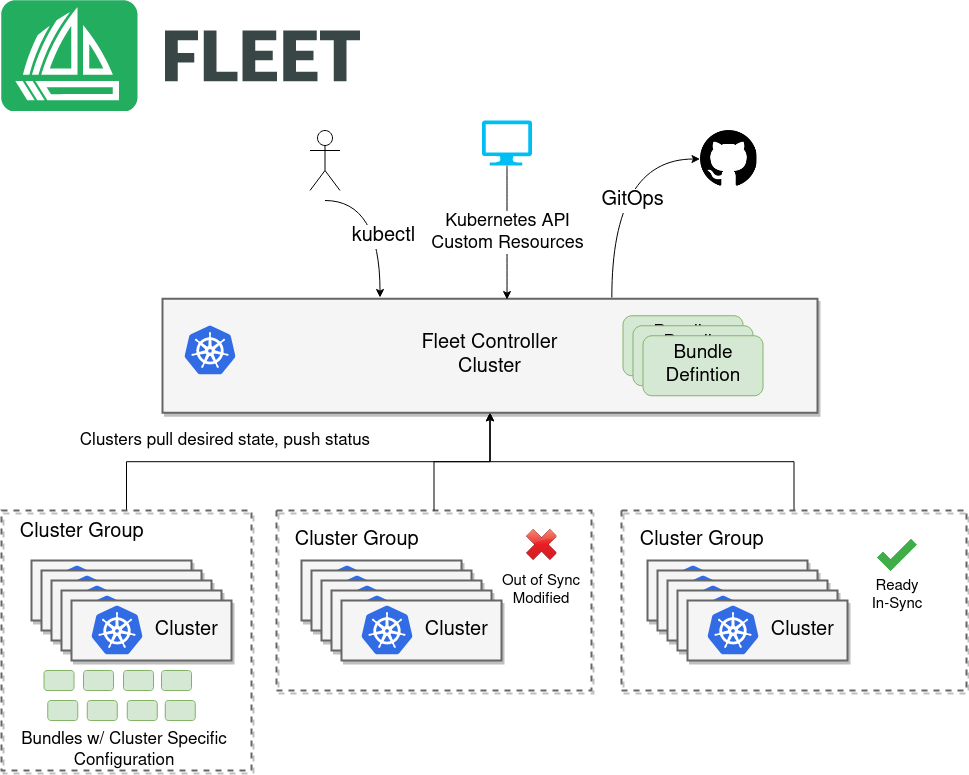
In the below use case, you will setup a centralized Fleet manager. The centralized Fleet manager is a Kubernetes cluster running the Fleet controllers. After installing the Fleet manager, you will then need to register remote downstream clusters with the Fleet manager.
Prerequisites
Helm 3
Fleet is distributed as a Helm chart. Helm 3 is a CLI, has no server side component, and is fairly straight forward. To install the Helm 3 CLI follow the official install instructions. The TL;DR is
macOS
brew install helm
Windows
choco install kubernetes-helm
Kubernetes
The Fleet manager is a controller running on a Kubernetes cluster so an existing cluster is required. All downstream cluster that will be managed will need to communicate to this central Kubernetes cluster. This means the Kubernetes API server URL must be accessible to the downstream clusters. Any Kubernetes community supported version of Kubernetes will work, in practice this means 1.15 or greater.
API Server URL and CA certificate
In order for your Fleet management installation to properly work it is important
the correct API server URL and CA certificates are configured properly. The Fleet agents
will communicate to the Kubernetes API server URL. This means the Kubernetes
API server must be accessible to the downstream clusters. You will also need
to obtain the CA certificate of the API server. The easiest way to obtain this information
is typically from your kubeconfig file (${HOME}/.kube/config). The server,
certificate-authority-data, or certificate-authority fields will have these values.
apiVersion: v1
clusters:
- cluster:
    certificate-authority-data: LS0tLS1CRUdJTi...
    server: https://example.com:6443
Please note that the certificate-authority-data field is base64 encoded and will need to be
decoded before you save it into a file. This can be done by saving the base64 encoded contents to
a file and then running
base64 -d encoded-file > ca.pem
If you have jq and base64 available then this one-liners will pull all CA certificates from your
KUBECONFIG and place then in a file named ca.pem.
kubectl config view -o json --raw | jq -r '.clusters[].cluster["certificate-authority-data"]' | base64 -d > ca.pem
If you have a multi-cluster setup, you can use this command:
# replace CLUSTERNAME with the name of the cluster according to your KUBECONFIG
kubectl config view -o json --raw  | jq -r '.clusters[] | select(.name=="CLUSTERNAME").cluster["certificate-authority-data"]' | base64 -d > ca.pem
Install
In the following example it will be assumed the API server URL from the KUBECONFIG which is https://example.com:6443
and the CA certificate is in the file ca.pem. If your API server URL is signed by a well-known CA you can
omit the apiServerCA parameter below or just create an empty ca.pem file (ie touch ca.pem).
Run the following commands
Setup the environment with your specific values.
API_SERVER_URL="https://example.com:6443"
API_SERVER_CA="ca.pem"
If you have a multi-cluster setup, you can use this command:
# replace CLUSTERNAME with the name of the cluster according to your KUBECONFIG
API_SERVER_URL=$(kubectl config view -o json --raw  | jq -r '.clusters[] | select(.name=="CLUSTER").cluster["server"]')
# Leave empty if your API server is signed by a well known CA
API_SERVER_CA="ca.pem"
First validate the server URL is correct.
curl -fLk ${API_SERVER_URL}/version
The output of this command should be JSON with the version of the Kubernetes server or a 401 Unauthorized error.
If you do not get either of these results than please ensure you have the correct URL. The API server port is typically
6443 for Kubernetes.
Next validate that the CA certificate is proper by running the below command. If your API server is signed by a
well known CA then omit the --cacert ${API_SERVER_CA} part of the command.
curl -fL --cacert ${API_SERVER_CA} ${API_SERVER_URL}/version
If you get a valid JSON response or an 401 Unauthorized then it worked. The Unauthorized error is
only because the curl command is not setting proper credentials, but this validates that the TLS
connection work and the ca.pem is correct for this URL. If you get a SSL certificate problem then
the ca.pem is not correct. The contents of the ${API_SERVER_CA} file should look similar to the below
-----BEGIN CERTIFICATE-----
MIIBVjCB/qADAgECAgEAMAoGCCqGSM49BAMCMCMxITAfBgNVBAMMGGszcy1zZXJ2
ZXItY2FAMTU5ODM5MDQ0NzAeFw0yMDA4MjUyMTIwNDdaFw0zMDA4MjMyMTIwNDda
MCMxITAfBgNVBAMMGGszcy1zZXJ2ZXItY2FAMTU5ODM5MDQ0NzBZMBMGByqGSM49
AgEGCCqGSM49AwEHA0IABDXlQNkXnwUPdbSgGz5Rk6U9ldGFjF6y1YyF36cNGk4E
0lMgNcVVD9gKuUSXEJk8tzHz3ra/+yTwSL5xQeLHBl+jIzAhMA4GA1UdDwEB/wQE
AwICpDAPBgNVHRMBAf8EBTADAQH/MAoGCCqGSM49BAMCA0cAMEQCIFMtZ5gGDoDs
ciRyve+T4xbRNVHES39tjjup/LuN4tAgAiAteeB3jgpTMpZyZcOOHl9gpZ8PgEcN
KDs/pb3fnMTtpA==
-----END CERTIFICATE-----
Once you have validated the API server URL and API server CA parameters, install the following two Helm charts.
First install the Fleet CustomResourcesDefintions.
helm -n cattle-fleet-system install --create-namespace --wait fleet-crd https://github.com/rancher/fleet/releases/download/v0.4.1/fleet-crd-0.4.1.tgz
Second install the Fleet controllers.
helm -n cattle-fleet-system install --create-namespace --wait \
    --set apiServerURL="${API_SERVER_URL}" \
    --set-file apiServerCA="${API_SERVER_CA}" \
    fleet https://github.com/rancher/fleet/releases/download/v0.4.1/fleet-0.4.1.tgz
Fleet should be ready to use. You can check the status of the Fleet controller pods by running the below commands.
kubectl -n cattle-fleet-system logs -l app=fleet-controller
kubectl -n cattle-fleet-system get pods -l app=fleet-controller
NAME                                READY   STATUS    RESTARTS   AGE
fleet-controller-64f49d756b-n57wq   1/1     Running   0          3m21s
At this point the Fleet manager should be ready. You can now register clusters and git repos with the Fleet manager.